
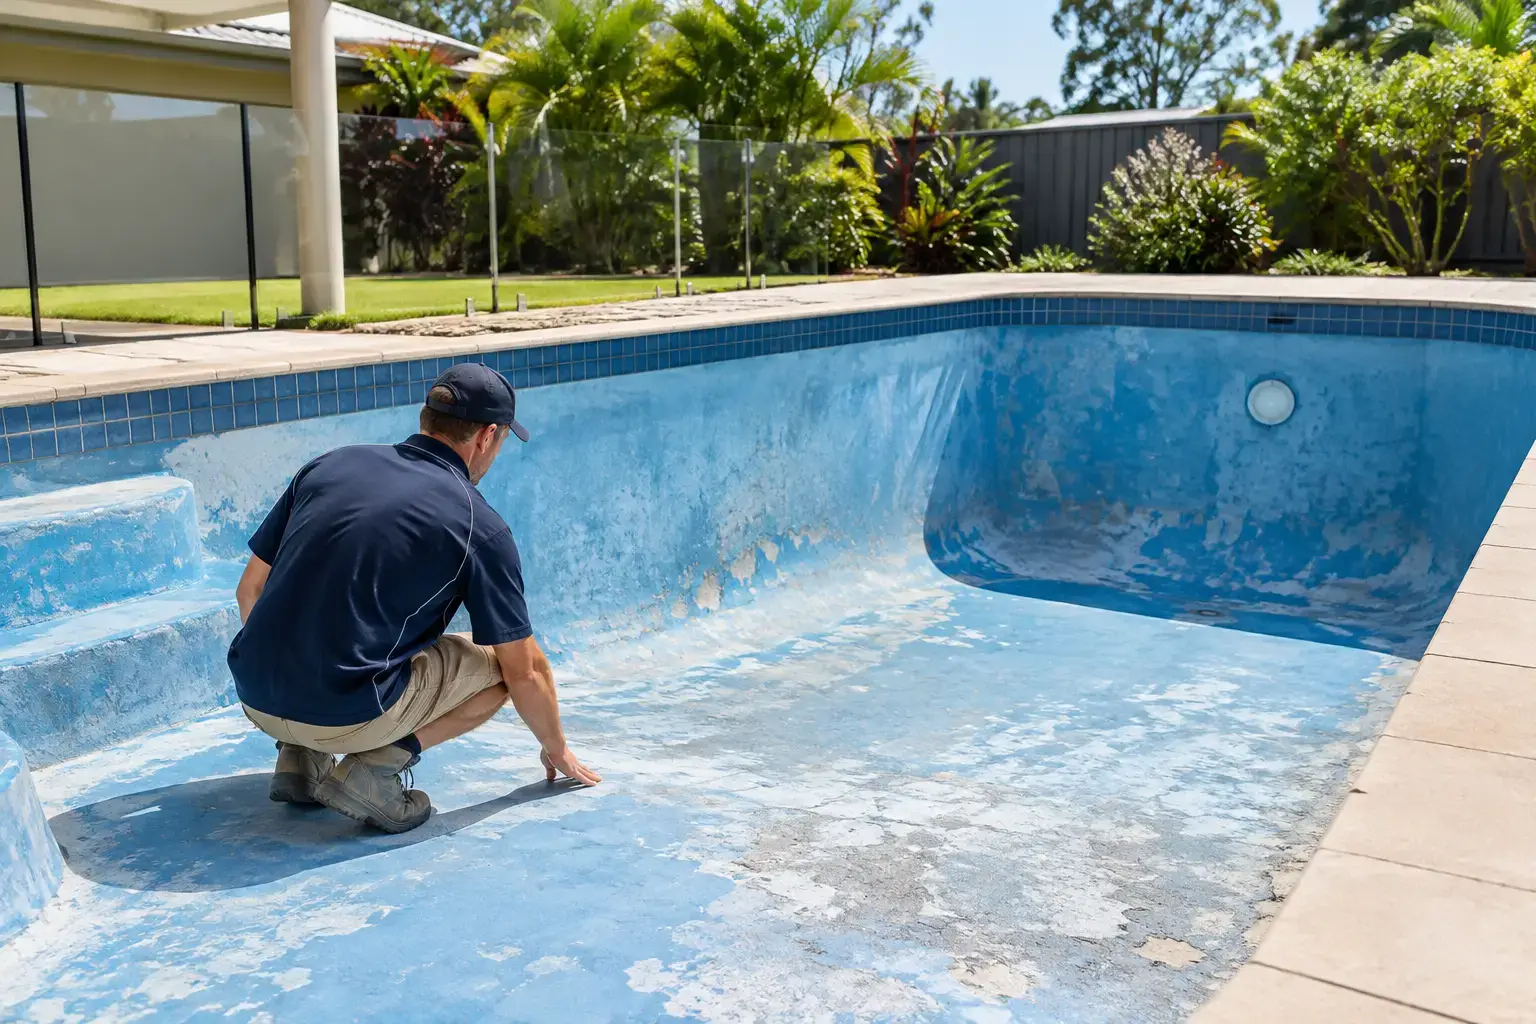
A pool that looks tired does not always need every trace of old coating stripped away. But can old pool paint stay when you repaint? Only if it is sound, well bonded and compatible with the new coating system. Painting over loose, chalky or unknown paint without checking it first is one of the quickest ways to end up with peeling paint again.
The decision comes down to the condition of the existing coating, the pool surface underneath and the paint you intend to apply. A sound coating can often become part of the preparation work. A failed coating must be removed back to a stable surface before any primer or new pool paint is applied.
Can Old Pool Paint Stay Before Repainting?
Yes, old pool paint can stay if it passes a proper condition check. It needs to be firmly adhered across the pool, free of widespread blistering and not breaking down into powder when rubbed. The surface also needs to be prepared to suit the replacement coating.
This is not a shortcut for avoiding preparation. Even paint that remains in place needs thorough cleaning, sanding or mechanical abrasion where required, and careful attention to edges, corners, steps and areas around fittings. The new coating can only bond as well as the old paint is bonded to the pool.
If the existing paint is lifting, flaking, cracking through several layers or coming away in sheets, it cannot be used as a base. Any fresh coating applied over it is attached to a failing layer, not the concrete or fibreglass beneath.
Start with an adhesion check
Inspect the pool when it is empty, dry and easy to examine in good light. Look closely at the floor, walls, waterline area, steps and repairs. These areas often show different levels of wear.
Press a strong adhesive tape onto several representative areas, then pull it away firmly. If paint comes off with the tape, the coating is not adequately bonded. Also rub the surface with a clean cloth. Heavy chalking, powdery residue or colour transfer can indicate that the old film is deteriorating.
Check any blisters carefully. A blister may be isolated, but it may also indicate poor adhesion beneath the surrounding paint. Scrape at the edge of a damaged area. If the coating continues to release easily, removal needs to continue until you reach a stable layer.
A few localised defects do not always mean the entire pool must be stripped. If the surrounding coating is firmly bonded, it may be practical to remove failed areas, feather the edges and repair the prepared surface in line with the chosen coating system. Widespread failure is different. In that situation, spot repairs simply create a patchwork base with unreliable adhesion.
Identify the Existing Pool Paint First
The most important question is not just whether the old paint can stay. It is what that paint is.
Many older concrete pools have epoxy or chlorinated rubber coatings. These are different systems, with different preparation and recoating requirements. Choosing a new paint based only on colour or convenience can create compatibility problems that are difficult to fix once the coating has cured.
If you know the product previously used, keep the tin, invoice or product details. This gives you the best starting point for selecting a compatible replacement system. If the history is unclear, do not guess. A pool may have been repainted several times, leaving different layers beneath the visible surface.
A practical approach is to assess the existing coating with the product information for the system you are considering, then seek technical guidance before ordering. Knowing whether you have a concrete or fibreglass pool is equally important, as the suitable coating and primer requirements can differ.
Epoxy and chlorinated rubber are not interchangeable
Two-pack epoxy pool paint is commonly selected where a high-performance coating system is required, but it must be applied over a correctly prepared and compatible substrate. Chlorinated rubber pool paint has its own compatibility rules and should not be treated as a universal topcoat over any old paint.
The right choice depends on the existing coating, its condition and the surface exposed after preparation. If you are repainting an existing epoxy coating that is sound, an epoxy-compatible system may be the appropriate path. If the pool has a sound chlorinated rubber coating, use a system confirmed as suitable for that coating.
Where old paint has been fully removed and bare concrete is exposed, primer selection becomes part of the job. Do not assume a primer is optional simply because some paint remains elsewhere in the pool. Exposed concrete, repaired sections and bare fibreglass can need specific preparation or a compatible primer to create a consistent base.
When Old Pool Paint Must Be Removed
Old paint should be removed wherever it is no longer a stable base. This includes coating that peels under light scraping, has broad areas of bubbling, is badly cracked, or has poor adhesion after testing.
Removal is also the safer option when the existing coating cannot be identified and its compatibility with the proposed paint cannot be confirmed. Applying an incompatible system may result in lifting, wrinkling, softening or early coating failure. The cost is not only more paint. It is the extra time needed to strip back a newly failed finish.
Pay particular attention to these warning signs:
- Paint releasing in sheets or strips when scraped.
- Blisters appearing across walls or the floor rather than in one small area.
- A heavily chalked or powdery surface that cannot be prepared to a firm finish.
- Multiple old layers separating from one another.
- Unknown paint where the proposed coating system cannot be confirmed as compatible.
Do not paint over damp surfaces or areas affected by an underlying pool structure issue. Coating is not a repair for damaged concrete, movement cracks or substrate problems. Those issues need to be addressed before coating work begins.
Prepare Sound Paint Properly
Keeping sound old paint can save unnecessary stripping, but it does not reduce the need for careful surface preparation. Dirt, grease, loose residue, chalking and gloss can all interfere with adhesion.
First, remove all loose paint and any failed patches. Feather the remaining edges so the repair does not leave a sharp step through the new finish. Clean the surface thoroughly, then allow it to dry fully. Next, abrade the sound coating as required by the new paint system so the surface is clean, dull and ready to accept the next coat.
Avoid rushing this stage during Sydney’s warmer months. Heat can make a job feel ready to coat before the surface has been prepared evenly, while changing weather can affect working conditions. Follow the product instructions for surface preparation, application conditions, mixing and recoating. Those details matter more than trying to finish the pool in a single weekend.
If bare areas are exposed during preparation, treat them as part of the system, not as an afterthought. Confirm whether the selected primer is required for those areas and whether it is compatible with both the substrate and the topcoat.
Calculate the Full Coating System Before Ordering
A repaint is rarely just a matter of buying enough topcoat for the pool’s length and width. Allow for the actual pool shape, walls, floor, steps, ledges and any primer needed on bare or repaired areas. Ordering too little can interrupt the job, while buying a mismatched primer or topcoat can create a bigger problem than a quantity shortfall.
Use the Pool Paint Calculator to estimate the coating area and product quantity for your pool. Then check the coverage information for the exact coating system and number of coats you plan to apply. Coverage varies with the product, surface profile and application method, so calculator results should support your planning rather than replace the product directions.
Before purchasing, have three details ready: your pool surface type, the known or suspected existing coating, and whether preparation will expose bare concrete or fibreglass. With that information, Pool Paint Sydney can help you narrow down the correct epoxy or chlorinated rubber system, compatible primer and quantity required.
A durable repaint starts with an honest decision about the old coating. Keep it only where it is clean, sound and confirmed as a suitable base. Remove what has failed, prepare what remains properly, and choose the full coating system before the first tin is opened.