
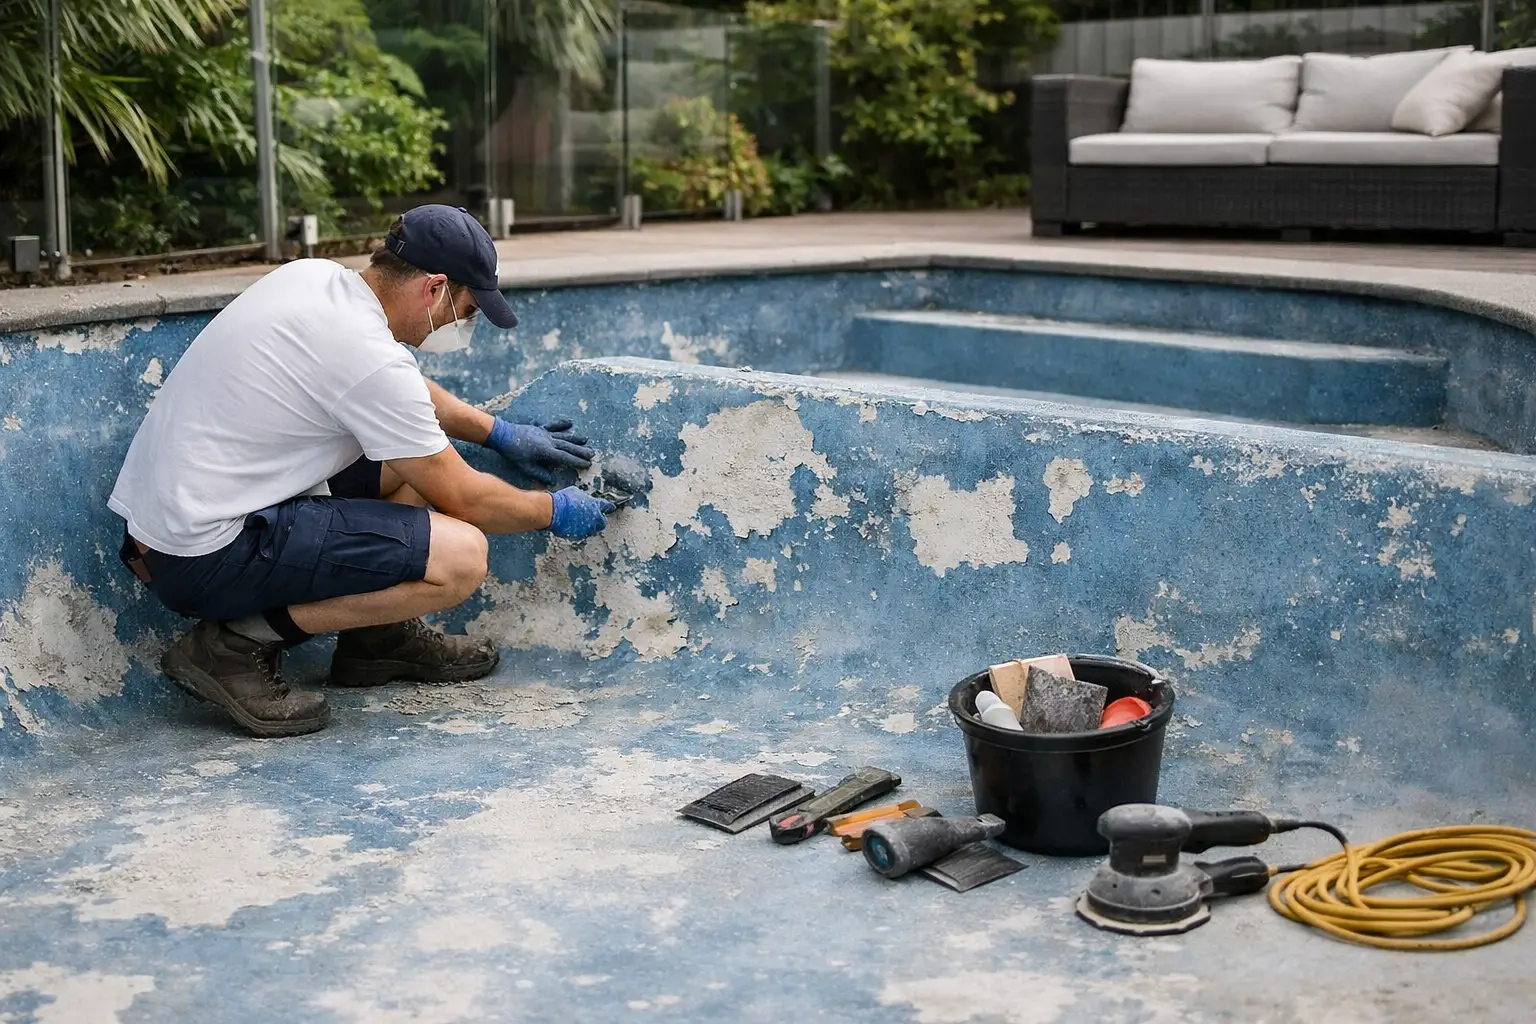
Peeling paint is rarely just a paint problem. Most pool coating adhesion problems begin before the first coat goes on: the old finish was not identified, loose material was left behind, the surface was contaminated, or a new coating was applied outside the right conditions. If you are repainting a concrete or fibreglass pool, finding the cause first is the difference between buying the correct system once and repeating the job far too soon.
A coating can only adhere as well as the surface beneath it. That means a sound-looking pool may still need serious preparation, while a badly flaking pool may require complete removal of failed areas before any primer or topcoat is considered.
What causes pool coating adhesion problems?
The most common cause is applying a new coating over an existing finish that is already failing. New paint can temporarily make the pool look better, but it cannot strengthen weak, blistered or poorly bonded old paint. When the old layer lifts, the new one lifts with it.
Incompatible coating systems are another major issue. A two-pack epoxy pool coating, chlorinated rubber pool paint and older unknown coatings do not automatically work together. The correct choice depends on what is currently on the pool, whether it is firmly bonded, and whether the proposed coating system is approved for that substrate.
Preparation also matters just as much as product selection. Dust, chalking, grease, residue, moisture and smooth glossy paint can all interfere with adhesion. In Australian conditions, hot surfaces, direct sun and changing weather can further narrow the practical application window. Paint applied to a surface that is too hot, damp or not properly prepared may fail even when the product itself is suitable.
The failure pattern can point to the cause
Look closely at where and how the coating is coming away. Wide sheets of paint lifting back to a clean, smooth surface often suggest poor adhesion to the substrate or previous coating. Flaking that exposes several old layers may indicate repeated repainting over weak paint. Blisters can be associated with moisture, contamination or movement beneath the coating, although the exact cause needs to be assessed before choosing a fix.
If paint is only failing in isolated spots, do not assume a quick touch-up is enough. Check whether those spots are localised damage or the first visible signs of broader coating failure. Tap and scrape around the affected area. If the edge keeps releasing, the problem extends beyond the section you can see.
Start with the existing pool surface
Before ordering paint, establish whether the pool is concrete or fibreglass and identify the existing coating as accurately as possible. This is the decision that shapes everything else: surface preparation, primer requirement and the compatible topcoat.
For a previously painted concrete pool, determine whether the old finish is epoxy, chlorinated rubber, another pool coating, or unknown. Previous invoices, leftover tins and product labels are useful. If the history is unclear, avoid guessing based on colour or appearance alone. A professional coating assessment or a small compatibility test can prevent an expensive whole-pool failure.
Fibreglass pools need the same care, but there is an additional risk. The surface may be a previously painted coating or a gelcoat-based finish, and preparation must suit that surface. Using an unsuitable product or overly aggressive preparation method can create more work rather than solve the adhesion issue.
The simple rule is this: a sound, correctly identified coating may be prepared and recoated with a compatible system. An unsound coating needs to be removed back to a stable layer or suitable substrate. Paint is not a repair product for failed layers, cracks, structural defects or loose fibreglass.
How to prepare a surface that paint can hold onto
Preparation should be planned as a full system, not treated as a quick clean before painting. The aim is to remove anything that can prevent contact between the new coating and a stable surface.
First, remove all loose, flaking and poorly bonded paint. Scrape, sand or mechanically abrade as appropriate for the surface and coating condition. Continue until you reach firmly adhered material. Feather the edges between remaining sound paint and exposed areas so they do not leave sharp steps under the new finish.
Next, clean the surface thoroughly to remove dust and contaminants created during preparation. A pool surface can look clean yet still carry fine sanding residue or other contaminants that compromise adhesion. Follow the preparation and cleaning instructions for the selected coating system rather than substituting products or skipping stages.
Glossy or very smooth coatings generally need an appropriate surface profile before recoating. This gives the new coating something to mechanically bond to. However, more abrasion is not always better. The correct approach depends on whether you are preparing old paint, bare concrete or fibreglass. Follow the relevant product data and primer guidance for the substrate.
Finally, allow the surface to dry completely and inspect it in good light. Check for dust, loose edges, chalky areas and missed patches of failed paint. This last inspection is where many avoidable problems are caught.
Do not paint over these warning signs
Stop and reassess if you find widespread blistering, soft or rubbery old paint, persistent chalking, ongoing dampness, or paint that releases easily when scraped. These conditions suggest the surface is not ready to coat.
Also avoid applying paint when the surface is excessively hot, exposed to strong direct sun, wet from rain or condensation, or likely to be affected by unsuitable weather during application and curing. Sydney and NSW pool owners often plan repainting around warm weather, but a hot day is not automatically a good painting day. Check the coating system’s specified temperature, humidity and drying requirements before starting.
Choosing epoxy or chlorinated rubber pool paint
The right pool paint is not simply the product with the highest specification. It must be compatible with the existing coating and the preparation you can complete properly.
Two-pack epoxy pool paint is commonly selected for suitable concrete and fibreglass pool repainting projects where the existing surface and coating system allow it. It is a system that requires accurate mixing, careful application and close attention to product instructions. Because it is a two-pack coating, do not estimate ratios or mix more material than you can apply within the stated working time.
Chlorinated rubber pool paint may be the appropriate choice where it is compatible with the existing coating and substrate. It is not an interchangeable substitute for epoxy. Applying one coating type over another without confirming compatibility is a common source of pool coating adhesion problems.
Primer is equally specific. Bare or prepared areas may require a compatible primer, while some sound existing coatings may have different requirements. Using primer where it is not specified can be as unhelpful as omitting a required primer. Select the primer as part of the complete coating system, not as an afterthought.
Pool Paint Sydney provides BG Coatings pool coating systems for concrete and fibreglass pools, including two-pack epoxy, chlorinated rubber and compatible primers. Use the product information to match the system to the existing surface, and seek specialist guidance if the old coating cannot be confidently identified.
Apply enough coating, not just enough to change the colour
Thin application can leave a finish with reduced protection and an uneven appearance. On the other hand, applying coats too heavily or without following recoat instructions can create its own problems. The target coverage, number of coats and recoat process must come from the relevant product information.
Calculate the full internal area of the pool before ordering. Include the floor, walls, steps, ledges and other coated surfaces, then allow for the system requirements rather than ordering by water volume. The Pool Paint Calculator is the practical place to start for paint and primer quantities. It helps reduce the risk of running short halfway through a coat or buying a coating system without enough product to apply it correctly.
Measure carefully, particularly on freeform pools. Breaking an irregular pool into simple sections usually gives a more reliable estimate than guessing from overall length and width. If the pool has a deep end, steps or a spa section, include them in the calculation.
When a local repair is enough and when it is not
A small repair may be reasonable when the surrounding coating is firmly bonded, the affected area has a clear local cause, and the repair system is compatible with the existing finish. The failed material still needs to be removed and the edges prepared properly before priming or recoating.
If failure is widespread, patching can become false economy. A pool with large areas of flaking, recurring blisters or uncertain old coatings needs a broader preparation plan. In that situation, identify the stable surface first, then choose the correct compatible coating and primer system.
Do not let a peeling area push you into the fastest product choice. Take time to identify the old finish, prepare back to sound material, calculate the required quantity and follow the selected system exactly. That practical groundwork gives your new pool coating the best chance to bond properly and look right when the pool is ready to be filled again.