
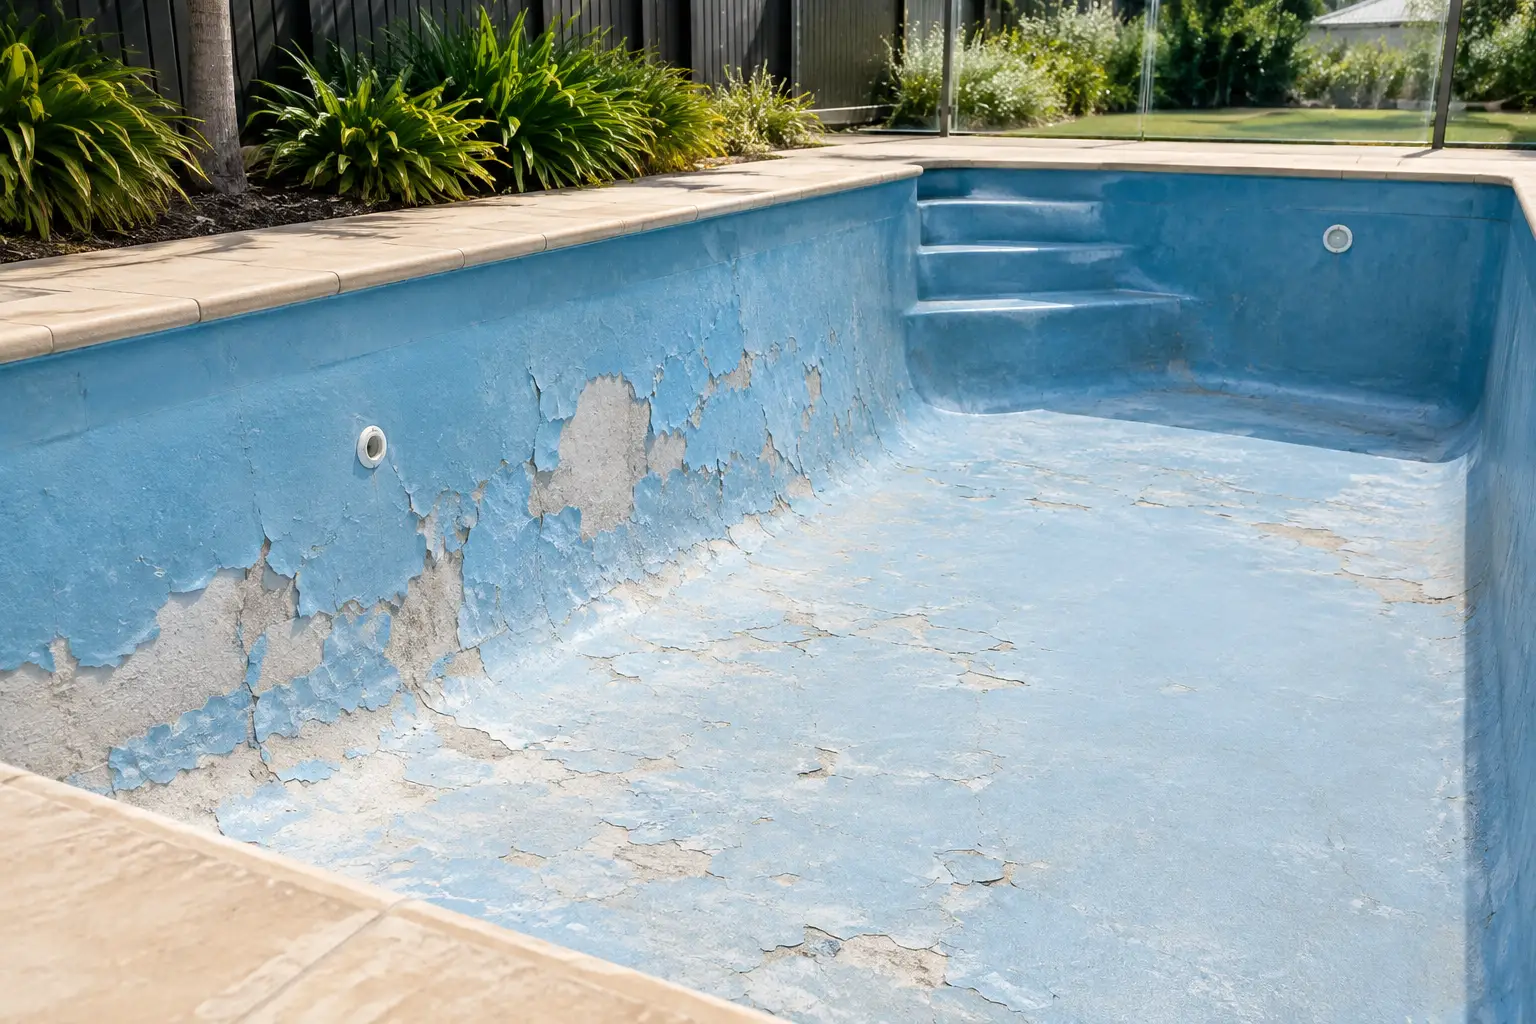
Paint that lifts from a pool wall in sheets, flakes around steps or forms blisters is not usually a paint-quality problem alone. When people ask what causes coating delamination, the answer is nearly always found in the surface beneath the failed coating, the compatibility of the coating system, or the conditions during application. Repainting over the visible failure without dealing with its cause can leave you with the same problem again.
For concrete and fibreglass pools, adhesion depends on choosing a coating system that suits the existing surface, preparing that surface properly and applying the paint within the manufacturer’s requirements. Get one of those steps wrong and even a high-performance pool coating can fail prematurely.
What causes coating delamination in a pool?
Coating delamination occurs when the bond between paint layers, or between the paint and the pool substrate, breaks down. It may appear as peeling, chipping, bubbling, cracking or areas where the coating can be pulled away with little effort.
The failure pattern provides a useful clue. If paint comes away down to bare concrete or fibreglass, the issue is usually poor adhesion to the substrate. If one paint layer separates from another, an incompatible coating, contamination or inadequate surface profiling is more likely. Blisters can point to moisture vapour, trapped air, poor drying conditions or contamination beneath the coating.
The practical fix is not simply to apply another coat. First establish what the existing pool surface is, what coating is already present and how far the failure extends. Sound, firmly adhered coating may be suitable for recoating with a compatible system. Loose, peeling or doubtful coating needs to be removed before repainting.
Poor surface preparation is the usual cause
Pool paint needs a clean, dry and stable surface. Old coatings often hold traces of oils, sunscreen residue, dirt, loose chalking material or cleaning residues. On concrete, weak or powdery material can remain at the surface even when the pool looks clean. On fibreglass, the smooth surface may not provide enough mechanical grip if it has not been correctly abraded.
Painting over any of these conditions creates a weak boundary layer. The new coating bonds to the contamination or unstable old paint rather than the pool itself. Once the pool returns to service, water pressure, temperature changes and normal movement can expose that weakness.
Preparation should remove all loose coating and create a clean, sound surface. For an existing painted pool, check adhesion across the entire shell, not just where peeling is obvious. Scrape and sand-test suspect areas. If the coating releases easily, it is not a suitable base for a new system.
Concrete also needs to be properly prepared according to the coating system being used. A surface that is too smooth can limit adhesion, while a surface that is dusty, damp or contaminated can cause the same result. Fibreglass requires particular care because solvent wiping, sanding and suitable primer selection may all be relevant depending on the existing finish and chosen coating.
Incompatible pool paint systems cause paint layers to separate
One of the most expensive mistakes in pool repainting is applying a new coating over an unknown or incompatible old coating. Two-pack epoxy pool paint and chlorinated rubber pool paint are different systems. They do not behave the same way, and the previous coating matters when deciding what can be applied over it.
A chlorinated rubber coating may be suitable when recoating a sound, compatible chlorinated rubber-painted surface. A two-pack epoxy system can offer a different coating option, but it requires the correct preparation and must not be treated as a universal topcoat for every existing painted pool.
If you do not know what paint is currently on the pool, do not guess based on colour, age or appearance. A simple solvent test can sometimes help identify the existing coating, but it is not a substitute for checking the product information and assessing the surface condition. If the old paint cannot be identified with reasonable confidence, removal of failed or uncertain material may be the safer path before applying the new coating system.
Primer is also part of compatibility. A primer is not an optional extra added to solve every adhesion problem. It must be compatible with both the pool substrate and the topcoat. Using the wrong primer, or applying primer over an unstable old coating, can simply shift the failure point from one layer to another.
Choose the system based on the surface underneath
For a concrete pool with sound existing epoxy, chlorinated rubber or another coating, identify the existing system before selecting a repaint product. If bare concrete is exposed after preparation, follow the specified primer requirements for the coating you intend to use.
For fibreglass pools, do not assume a concrete-pool process will work. Fibreglass surfaces need the right preparation method and a coating system designed for that type of substrate. If old paint is present, its adhesion and compatibility still determine whether it can remain.
The correct product decision comes after the surface assessment, not before it. This is how you avoid buying a coating that looks suitable on paper but is wrong for the pool in front of you.
Moisture, weather and application timing matter
A pool surface can appear dry yet retain moisture within concrete or behind an old coating. When moisture vapour moves through the substrate, it can create pressure under the paint film. The result may be blistering followed by peeling or complete delamination.
This risk is particularly relevant after wet weather, in shaded areas, and where a concrete shell has not had sufficient drying time after preparation. Sydney and NSW conditions can change quickly, so plan the work around a suitable dry weather window rather than relying on a single fine morning.
Temperature also affects application and curing. Very hot surfaces can make paint flash off too quickly, reducing its ability to wet out and bond properly. Cold, damp or humid conditions can interfere with curing and leave the coating vulnerable. Follow the product’s stated application conditions, mixing instructions, recoat window and curing requirements exactly.
Two-pack epoxy products add another important variable: mixing. Incorrect mix ratios, incomplete mixing or using mixed product after its stated working time can compromise the coating. Measure accurately and only mix the quantity that can be applied within the specified pot life.
Thin coats and missed areas can lead to early failure
Pool coatings are designed to be applied at a specified spread rate. Stretching paint too far to make it cover a larger area can leave a film that is too thin. A thin film may not provide the protection or adhesion expected from the system, particularly in high-wear areas such as steps, ledges and around fittings.
Applying coats too heavily can also cause problems. Thick paint may trap solvent, dry unevenly or struggle to cure correctly. The aim is not the thickest possible finish. It is the correct number of coats, applied evenly at the manufacturer’s recommended coverage rate.
Before ordering, measure the pool accurately and use the Pool Paint Calculator to estimate the required paint and primer quantity. Allowing for the pool’s walls, floor, steps and ledges helps prevent the temptation to stretch product at the end of the job. If your pool shape or existing surface is unusual, confirm the system and quantity before ordering.
How to fix a delaminating pool coating
The repair approach depends on how widespread the problem is. Small, localised damage may be repairable only if the surrounding coating is firmly bonded and compatible with the intended repaint system. Scrape around the affected area until you reach sound material, then prepare the transition carefully so the repair does not leave a weak edge.
Widespread peeling is different. If coating is failing across walls, the floor or multiple sections, spot repairs are unlikely to be reliable. Remove the loose and poorly adhered material, assess what remains, and prepare the pool based on the actual substrate and coating type. Do not use fresh paint to glue down lifting edges.
Before applying any new pool paint, work through these checks:
- Identify whether the pool is concrete or fibreglass.
- Determine the existing coating type where possible.
- Remove all loose, blistered, chalky or poorly adhered paint.
- Clean and prepare the sound surface as required for the selected system.
- Confirm whether a compatible primer is required.
- Apply the correct coating at the specified spread rate and in suitable weather.
If the failure seems linked to cracks, hollow areas, water ingress behind the coating or a problem with the pool structure, paint alone will not correct it. Those underlying issues need to be addressed before recoating.
Buy the correct repaint system the first time
Delamination is frustrating because the visible problem is paint, but the real cause is often hidden underneath. The most reliable way forward is to identify the existing surface, remove failed material and select a compatible epoxy or chlorinated rubber pool coating with the appropriate primer where required.
Pool Paint Sydney can help you work through the coating type, primer requirements and product quantity before you order. Start with the Pool Paint Calculator, then match the result to the condition of your concrete or fibreglass pool. A careful assessment now is far cheaper than repainting over a failure that is still waiting underneath.